Thursday, February 12, 2015

Gourmet Mushroom Flatbread Pizza

Want to impress someone? This will get the job done! My mouth is still watering every time I think of this mushroom-y goodness! I served it with a basic Caesar salad on the side. This might be my masterpiece...


What you will need...


  • One large flat bread crust (I used one that was more like naan).
  • 1 cup of mozzarella cheese
  • 1/2 cup of shredded parmesan cheese
  • 4 or 5 mini portabella mushrooms
  • 1/2 large white onion, finely diced
  • 1/2 apple, finely diced
  • 1/2 cup of finely chopped kale 
  • 3 green onions, finely chopped
  • 1 teaspoon of minced garlic 
  • 1 teaspoon of dried basil
  • 2 Tbsp. mayo
  • Olive oil
  • Trader Joes black truffle flavored olive oil ($5)

What to do...

  • Preheat oven to 400 degrees F 
  • Begin dicing the onions, apples and mushrooms.
  • In a pan, caramelize onions with apple and one mushroom
  • In a small bowl whisk together olive oil, garlic and basil and brush the mixture onto the crust
  • Add a handful of mozzarella cheese to the crust
  • Top pizza with diced mushrooms, kale and caramelized onions. 
  • Top with a small handful each of parmesan cheese, chopped green onions and more mozzarella cheese.
  • Finally, in a small bowl mix mayonnaise, black truffle oil and garlic and drizzle mixture of the pizza
  • Bake for 12-14 minutes, remove from oven and garnish with remaining paremesan and green onions and serve! 

You will not be disappointed, my friends. 

Wednesday, January 21, 2015

Easy, Delicious Vegetarian "Chicken" Salad

Guys. Have you ever had tempeh? I order it frequently off vegan/vegetarian menus but I finally had the pleasure of cooking with it! This vegetarian chicken salad blew my mind! Its my new favorite thing so here it is!


What you will need...

  • 1 8 oz. package of organic 3 grain tempeh (Trader Joes $2) or your favorite tempeh
  • 1 cup of diced onion
  • 1 small crisp apple, diced
  • 1/2 cup of diced red pepper
  • 1/2 cup of diced bread and butter pickles (plus a splash of the pickle juice)
  • 1/2 cup of very small grapes (Trader Joes, $3) 
  • Mayo (recipe easily made vegan with veganaise)
  • dashes of sea salt, black pepper, cumin, dried parsley, dried chives 
This is what you do...
  • To season the tofu
    • add 1 cup of water to a sauce pan with parsley, sea salt, cumin and chives
    • break tempeh into a few smaller pieces
    • let simmer, covered for 10 minutes and let the water boil off (like with rice!)
  • while that is cooking dice up onion, apple, pepper and pickles
  • add in a little extra pickle juice, sea salt and grapes
  • dice up the seasoned tempeh and add to the mixture and put in the refrigerator to cool. 
  • Once cool add about three spoonfuls of mayo and combine well. 
This recipe took about 15 minutes and I have this yummy, healthy lunch to last the whole week! I served it in a pita pocket with greens. 

Enjoy! 

Monday, January 12, 2015

Enchilada Quinoa

Do you ever just want to make a huge batch of something delicious and then live off it for a whole week? I did last night when I made this spicy, cheesy, satisfying quinoa dish!

*Update: leftovers for lunch were EVEN BETTER*

This is what you will need...

  • 1 cup of uncooked quinoa
  • 2 cups of vegetable/chicken stock
  • 2 cups of frozen roasted corn (Trader Joes)
  • 1 red bell pepper
  • 1 small onion
  • desired number of slices of jalapeno peppers
  • 10 grape tomatoes
  • 1 avocado
  • 1 cup of finely chopped romaine lettuce 
  • 1 cup of shredded pepper jack cheese
  • 1 cup of shredded mozzarella cheese
  • 1 tsp of cumin
  • 2 tsp of chili powder
  • 1 cup of enchilada sauce 
  • 1 bunch of chopped cilantro leaves
  • 2 large lime wedges
  • salt and pepper to taste
  • dollop of sour cream!
  • optional: 1 can of black beans and/or 2 cups of cooked, diced chicken (or neither if you are a vegetarian and your boyfriend is a beanaphobe)
This is what you do...
  • Preheat oven to 400 and mist a baking dish with cooking spray
  • Cook quinoa according to directions on package in vegetable stock (alternatively, sea salt, dried parsley, dried chives.)
  • In a large mixing bowl combine, quinoa, enchilada sauce corn, pepper, onion, jalapeno, 5 diced grape tomatoes, 1/2 cup of pepper jack, 1/2 cup of mozzarella, cumin, chili powder, cilantro, salt and pepper and juice of 1 lime wedge.
  • Once well combined, pour mixture into baking dish and top with the remaining cheese. 
  • Bake for 20 minutes, or until cheese bubbles.
  • Garnish with diced avocado, tomatoes, lettuce, sour cream and lime wedge.
Easy easy easy!!


This recipe was largely adapted from a similar website here.

Tuesday, December 9, 2014

Healthy Salmon Burgers in 15 Minutes or Less (for $5 or Less)

Until now, canned fish freaked me out big time (tuna included)... Desperate to cook salmon burgers, with few dollars to spare I took a leap of faith and purchased Trader Joes canned salmon. Fearing the worst, I peeled open the can,  and to my delight found the fish to be not smelly, salty mush but large chunks of seemingly fresh salmon- no gross smell detected! I drained the excess water and got to work on my burgers. 

What you need...


  • 1 small can of Trader Joes Alaskan Pink Salmon, drained
  • 1 15 oz. can of white beans
  • 3 green onions, chopped
  • 1 large handful of kale, chopped small
  • 2 heaping table spoons of whole wheat flour
  • 1 large egg
  • desired spices (salt, pepper, maybe a little cumin) 
  • oil/cooking spray

What to do...

  • In a large bowl mash white beans (or puree them if your boyfriend gets freaked out by the texture of beans and the sight of one single, whole bean will cause him to turn white and panic)
  • Combine salmon, onions, kale, egg, flour, spices, adding more flour if desired to make the mixture stick.
  • With clean hands, form mixture into patties about the size of your palm. 
  • Cook on frying pan with heated oil, turning to brown on each side on Medium High.
  • Reduce heat and cover to "bake" patty making sure the inside is cooked and not mushy. 
  • Serve on bun or bed of lettuce with homemade thousand island dressing
    • Thoroughly mix equal parts mayonnaise and ketchup
    • stir in finely diced bread and butter pickles 
This recipe yielded 3 excessively large patties. In the future I plan to use the mixture to form at least 4 patties and I might even go for the large can next time. The overall cost of this meal is probably less than $5! 

Friday, November 14, 2014

Cranberry Banana Oat Muffins

I have since experimented a bit with these muffins, attempting to make them a bit healthier and I must say these came out EVEN BETTER!  I thought you might enjoy trying another batch! I have italicized the changes from the previous muffin recipe ...

What you will need...
  • 1 1/2 cup of flour (I used whole wheat flour)
  • 1 tsp of baking soda
  • 1 tsp of baking powder
  • 1/2 tsp of salt 
  • 1 1/2 tsp of cinnamon
  • 1/8 tsp of nutmeg
  • 1 cup of oats
  • 3/4 cup of brown sugar 
  • 2 ripe bananas, mashed
  • 1 heaping tablespoon of pumpkin puree 
  • 1 egg
  • 1/3 cup of canola oil
  • 1 cup of fresh cranberries
What to do...
  • Preheat the oven to 350F 
  • spray bottom of muffin tin with cooking spray or line with muffin wrappers
  • mix together flour, baking soda, baking powder, salt, cinnamon, nutmeg and oats in a large bowl
  • In another bowl, thoroughly mix oil, pumpkin, bananas, brown sugar and egg
  • Mix the wet ingredients with the dry ingredients
  • fold in the cranberries
  • spoon into muffin tin
  • bake for 25 minutes
 

Noodle Bowl in Under 10 Minutes

Get out your chopsticks! 

This is the simplest recipe and its I love it hot or cold, as long as its drizzled with sriracha (my true weakness). 


What you will need...

  • Noodles (Soba, Udon, Ramen, Rice) Pictured are soba noodles, but ramen are my favorite)
  • 1/2 cup of frozen, shelled edamame
  • 1/4 cup of shredded carrots  
  • 1 large button mushroom
  • 1 chopped green onion
  • 1 egg
  • crushed cashews
 

For the dressing:
  • 1/4 cup of soy sauce
  • 1 Tbsp of sriracha (and more for drizzling, optional) 
  • 2 Tbsp of olive oil 
  • 1 tsp of sugar
  • 1 1/2 tsp of ginger
  • 1 1/2 tsp of cilantro 
  •  1/8 cup of finely diced onion 

What to do...

  • In a sauce pan boil your desired noodles
  • Start on the sauce by whisking together soy sauce, sriracha, olive oil, sugar, ginger, cilantro and onion. 
  • When the noodles are done, remove from heat, throw in the frozen edamame, shredded carrots, and mushroom and cover. 
  • Once the edamame is thawed, drain the noodles and vegetables and toss in the dressing. 
  • Top with an egg (crack egg onto a skillet, add 2 Tbs of water and immediately cover, leave undisturbed until egg is white and yolk is still runny.)
  • Put into a bowl and garnish with crushed cashews, green onion and of course, sriracha.
 
Displaying IMG_0637.JPG
 
 
 Just a tip: I have found, when I buy herbs so much of it goes to waste. Particularly when I buy cilantro, I hardly put a dent in the huge quantity I end up with and end up throwing the rest out. A good way to prevent waste is to freeze the herbs in olive oil in an ice tray. However, if you are like me and you lack the motivation to freeze your herbs as well as the freezer space to keep hundreds of herb cubes, you might be interested in trying these. Its not quite as good as the fresh stuff and it goes against my normal rule of thumb of using as few processed ingredients as possible but at least it isn't as wasteful! Plus I always have them onhand so I don't have to run out whenever I need fresh herbs or ginger. I really enjoy using these pastes in dressings and dipping sauces especially because they save you the hassle of finely chopping up these flavors manually. I found these in the refrigerated produce section with other herbs in Kroger. 

And one more tip, at Trader Joes "broken" cashews costs almost $2 less than regular, intact cashews!


Monday, November 10, 2014

Banana Oat Dark Chocolate Muffins

I have started to experiment with baking! This is my first successful attempt...
I'm working on tweaking this recipe into something a little bit more nutritious but for now enjoy these slightly healthy, extremely satisfying muffins for breakfast or dessert!

What you will need...

  • 1 1/2 cup of flour (I used whole wheat flour)
  • 1 tsp of baking soda
  • 1 tsp of baking powder
  • 1/2 tsp of salt 
  • 1 1/2 tsp of cinnamon
  • 1/8 tsp of nutmeg
  • 1/2 cup of oats
  • 3/4 cup of brown sugar 
  • 3 ripe bananas, mashed
  • 1 egg
  • 1/3 cup of butter, melted 
  • 1/2 cup of dark chocolate chips  


What to do...
  • Preheat the oven to 350F 
  • spray bottom of muffin tin with cooking spray or line with muffin wrappers
  • mix together flour, baking soda, baking powder, salt, cinnamon, nutmeg and oats in a large bowl
  • In another bowl, thoroughly mix butter, bananas, brown sugar and egg
  • Mix the wet ingredients with the dry ingredients
  • fold in chocolate chips (I didn't have chocolate chips so I put 1/2 bar of dark chocolate in a Ziploc bag and smashed it with a hammer ???)
  • spoon into muffin tin
  • bake for 25 minutes
 Enjoy!!


Friday, September 26, 2014

Beet Salad

So I experimented with beets for the first time! I saw these gorgeous beets at the Farmers Market and bought them for like 50 cents each and fell in love. I came up with this recipe for beet salad and its fast, inexpensive, healthy, raw, vegan... this recipe is everything. Not to mention beets are soooo good for you. 

Here is what you will need for 4-6 servings...

  • 2 medium/large beets, peeled, slivered or shredded 
  • 2 large carrots, peeled, slivered or shredded (or about 1.5 cups of shredded carrots)
  • 3 Tbsp of olive oil
  • 6 Tbsp of white balsamic vinegar (or vinegar of your preference) 
  • 1 tsp of sea salt
  • 1 Tbsp of honey 
  • Juice of 1 lemon wedge 
This is what you do...

In a small bowl, whisk together the olive oil, balsamic vinegar, sea salt, honey and lemon juice. 
In a large bowl combine the carrots and beets. Mix the vinaigrette into the beet and carrot mixture and allow it to soak in the refrigerator for a little while so they vegetables soak in all the flavor from the vinaigrette. 

Enjoy this magenta treat!   

Monday, September 15, 2014

Tzatziki

An impressive dish that is really healthy, really easy and takes no time to whip up!

What you will need:

  • 2 cups of reduced fat Greek yogurt
  • 1/2 cup of finely diced cucumber
  • 1/3 cup of finely diced white or yellow onion 
  • 3/4 teaspoon of minced garlic
  • 1 teaspoon of green pepper Tabasco
  • Salt and Pepper (Trader Joe's Everyday Seasonings) 
What you do:

  • Mix all ingredients together and serve with pita, crackers or veggies!  
I served this spread on warmed pita bread topped with grilled and seasoned tofu (or chicken) with chopped onions, cucumbers, spinach, tomatoes and shredded carrots and a little bit of sriracha for a kick and folded it up to make a gyro. 

Wednesday, September 10, 2014

Stuffed Zucchini

Sometimes you have odds and ends in your refrigerator and they somehow come together to make a masterpiece. 
This is one of those times. 

This is what you will need for 2 (sizable) portions:
  • 1 large zucchini (South of the James Farmers Market $1.50)
  • 1/2 package of soy chorizo (Trader Joes $1.99)
  • 1 1/2 cups of shredded cheese 
  • 1/2 cup of diced onions
  • 1 small/medium sweet potato, peeled and diced 
  • 1 small jalapeno pepper, diced (or 1/4 cup of diced sweet bell pepper)
  • 2 TBSP of ketchup
  • 2 TBSP of olive oil 
  • sour cream
  • dash of salt and pepper 

What you do:
  • preheat oven to 350F
  • cut the zucchini in half length-wise and scrape out the seeds so there is a large space to put the filling
  • brush or spray zucchini with olive oil
  • bake in oven on a baking sheet for 15-20 minutes until soft
  • while that is baking saute onions, pepper and sweet potato in olive oil, salt and pepper 
  • once soft, add thawed soy chorizo and saute until consistency is similar to cooked ground beef. 
  • stir mixture in with ketchup and shredded cheese cheese
  • remove zucchini from oven and set oven to "broil"
  • carefully add mixture to spaces in the zucchini half's where the seeds used to be
  • sprinkle with more cheese if desired
  • put back in the oven for another 5-8 minutes or until cheese is melted
  • allow to cool and top with dollop of sour cream! 
(Drop the cheese and sour cream and this recipe is dairy free,
 vegan, gluten free and nut free.) 

This recipe has perfect balance! Sweet from the sweet potatoes and ketchup, spicy from the jalapeno peppers, savory and zesty from the soy chorizo. This is an inexpensive, robust and warm fall meal. 


For those of you eager to get autumn started-Enjoy!

Monday, August 25, 2014

Lasagna with a secret ingredient

Lasagna is one of our favorite large dishes. The two of us can eat this for an entire week and never get sick of it! It takes about an hour to cook but its a simple enough recipe. I am going to reveal two amazing tricks that my mother taught me about making lasagna. 


You will need...
  • Lasagna noodles 
  • 1 large jar of tomato sauce (I often get a second jar just in case... no one likes to run out again to get more because you got sauce happy) 
  • 16oz ball of mozzarella cheese (shredded cheese just doesn't cut it!)
  • Ricotta cheese 
  • Tofu (???????????!?!) you'll see...
Tip #1 Do not cook the noodles! Often, when you cook the noodles before using them in your lasagna the whole thing gets really soggy and mushy. Instead use extra sauce! Allow the water in the sauce to cook the noodles for a firmer and tastier lasagna. 

Anyway, 
  • preheat the oven to 400F
  • pour some sauce at the bottom of your dish (glass, aluminum or ceramic)
  • place your uncooked noodles on the sauce
  • add more sauce
  • add a layer of mozzarella cheese
  • add a few blobs or ricotta cheese and spread it around a little
Tip #2 Ricotta can be both expensive and fattening so what I do is mix one small container of full fat ricotta cheese with one firm brick of tofu in a blender with a little bit of garlic. The consistency is exactly the same as straight ricotta but with less fat and it introduces a complete protein! Tofu on its own is relatively tasteless and takes on the taste of whatever it is being cooked with so when you use tofu in your lasagna it absorbs all the yummy sauce and cheese and you can't even tell something is different!
  • okay so you added the sauce, noodles, sauce, and first layer of cheese
  • next you add another layer of sauce
  • another layer of noodles
  • sauce
  • cheese
  • sauce
  • noodles
  • sauce
  • cheese
  • sauce... do you see a pattern? just make sure each noodles has a layer of sauce on either side of it
  • make the top layer cheese
  • bake for 40-50 minutes until the cheese on top is starting to bubble and brown
  • let sit and cool for 15 minutes and enjoy! 


Buffalo Tofu: this changes everything.

This was generating a lot of interest on my Facebook and Instagram so I thought I would share the recipe with the world! 

So oddly enough after almost 5 years of being vegetarian the only thing I miss is chicken wings! Not bacon, steak, ham or thanksgiving turkey- but spicy, messy, medium buffalo chicken wings. On one occasion I caved in and ate a chicken wing and was very disappointed- turns out it was the buffalo sauce I was missing and so I sought out a new vessel for the sauce. Making your own buffalo tofu is arguably better tasting and decidedly better for you, the environment, your wallet and our feathered friends.

So far I have used buffalo tofu on a sandwiches, wraps and pizza! I will share the recipes for all 3 :)


To prepare the tofu..

You will need
  • Extra firm tofu ($1.79 at Trader Joe's)
  • Buffalo/chicken wing sauce of your choice...Franks is pretty good but I like Wing-Time (Whole Foods Market $3ish dollars
  • Flour
  • salt, pepper, paprika (optional)
  • olive oil 
Directions
  • slice the extra firm tofu (make sure you have pressed as much water as possible
    • for a sandwich cut into large, medium-thin slices (about 4 slices/block)
    • for wraps, cut into medium sized cubes 
    • for pizza, cut into small cubes
  • toss the tofu in a mixture of flour, salt, pepper, paprika (optional) 
    • for a sandwich we just flour each side of the slice by putting it down on a plate of flour and flipping it over until both sides are coated
    • for the wraps or pizza we put the cubes and the flour in a large zip-lock or tupperware and shake until cubes are evenly coated
  • heat up oil in frying pan and cook tofu until golden brown
  • add sauce and cook to desired consistency (we have also tried this using BBQ sauce and stir-fry sauce! SO GOOD!) 

The Sandwich

You will need
  • whole grain bread
  • sliced lettuce, tomato, onions
  • cheese (I used manchego which is sheeps milk cheese) 
  • 1tbsp ranch dressing (I used Newmans Own)
  • a few avocado slices 
Directions
  • While the tofu was cooking I sliced a few pieces of cheese and put it on my bread and popped it in the toaster oven, cheese facing up obviously
  • then I took it out, added the lettuce, onions, tomatoes, avocado and ranch
  • topped it off with my tofu slices and enjoyed immensely! 
I served it with a cucumber salad I made using chunks of cucumber, tomato and onion seasoned with fresh rosemary and oregano with a little bit of olive oil and tomato balsamic vinegar. The cucumber cooled my mouth after eating the spicy sandwich.


The Wrap

You will need...
  • wraps of your choice, I like two taco sized tortillas rather than one burrito sized and Trader Joes's has this sun-dried tomato habanero wrap that I am really into. 
  • lettuce, onions, avocado, ranch dressing, shredded carrots 
Directions
  • simply lay our your wrap(s) and assemble it with all the desired veggies, dressings and tofu cubes
  • tip: lose the tortillas for a great salad! 

The Pizza
You will need...
  • pizza dough (I use Trader Joe's herb crust $1.00)
  • tomato sauce or marinara sauce (I use Trader Joe's tomato sauce and doctor it up with Mrs. Dash Italian seasonings and crushed garlic)
  • Mozzarella cheese (the fresh stuff is so worth it! Trader Joe's pre sliced fresh mozzarella is about $4) 
  • Shredded cheese
  • Buffalo sauce
  • Desired vegetables (I use onions, mushrooms and peppers) 
Directions
  • prepare your dough as instructed on the package (I make mine on the thinner side) 
  • add desired amount of sauce and cheese, evenly distributed (I go lighter on the cheese and sauce for buffalo pizza)
  • top with desired vegetables (stop right here and pop in the oven for a great easy veggie pizza!) 
  • top with small buffalo tofu cubes
  • drizzle with extra buffalo sauce
  • sprinkle with shredded cheese
  • bake according to instructions on dough package
I really hope you try and enjoy all three of these as much as I have! It really is cheaper and easier than you probably imagined! This, or a variation thereof is a weekly staple in our house. Sometimes we make a big batch of it and I bring it to work in wrap or salad form for lunch all week


Monday, July 28, 2014

Lentil, Rice and Veggie Burger


I had some left over lentils and rice so this was just a culmination of things in my fridge but I was amazed!  
Get ready for the most flavorful garden burger to ever grace your taste buds!


Here is what you will need:

  • 1/2 cup of brown rice
  • 1/2 cup of lentils 
  • large handful of diced onions
  • large handful of diced red bell pepper
  • a few jalapeno slices, diced
  • handful of spinach, chopped
  • handful of shredded carrots
  • handful of raisins
  • 1/2 teaspoon of crushed garlic 
  • 1-2 tbsp olive oil
  • two eggs
  • 1-2 cups of breadcrumbs 
  • sea salt, pepper, paprika, hot sauce (dashes and splashes) 
This is what  you do:
  • Cook the rice and lentils separately (they cook a little bit differently) 
    • Rice:
      •  1 cup of water (or I like to use veggie broth), 1/2 cup of rice. 
      • once boiling, reduce to a simmer and cover until water evaporates and rice is fluffy
    • Lentils:
      • 1 cup of water (or broth), 1/2 cup of lentils
      • simmer in an open sauce pan, adding water so lentils are always covered, for 10-12 minutes, drain. 
  • Over medium heat, saute the onions, pepper, jalapeno, carrots, spinach and garlic in olive oil until soft
  • Combine rice, lentils and veggies and raisins
  • whisk together two eggs and add to mixture
  • add enough breadcrumbs to make the whole mixture start to stick together. 
  • form into patties about the size of your palm
  • cook on frying pan which should still have enough oil left over from the veggies. 
  • cook on both sides and then cover to ensure that the middle isn't mushy and the burgers are browned and firm, but not dried out. 
Serve on a bun (I chose brioche) with greens, bread and butter pickles, avocado slices and whatever condiments you like (mayo, honey mustard, thousand island, etc.) 

I recommend a baked sweet potato on the side! Top it with butter, sour cream or goat cheese...

(wash potato, poke holes all over potato skin with a fork, put in the microwave for 4-5 minutes or hit the potato button) 

Aside from being absolutely delicious, there are a few more wonderful things about this recipe...

  1. Very cost effective, green lentils and brown rice can be bought in bulk for only a few dollars and they are very filling and make SO MUCH FOOD! (a bag of small sweet potatoes are only $1.69 at Trader Joes! and make a great, nutritious and quick side dish to any meal)
  2. The recipe is super flexible so you can put whatever you like, and omit anything you don't like. Not to mention, you may already have almost all the ingredients in your fridge- there aren't any fancy shmancy ingredients so usually no special shopping trip is necessary.
  3. You can make a whole bunch of it and it keeps really well... either form into patties, wrap in parchment paper, seal in a ziplock bag and freeze or keep mixture in a tupperware in the fridge for up to a week. 
  4. If the mixture is made in advance you can throw this meal together in about 10 minutes total! 
  5. You only dirty like 3 things (cutting board, mixing bowl, skillet)
Enjoy!!


Friday, July 18, 2014

Iced Coffee

Okay.

I just did that thing where you freeze the coffee in an ice cube tray and add milk so as to not dilute your iced coffee and WOW!

I used Fresh Market tiramisu flavored freshly ground coffee and unsweetened vanilla almond milk from Trader Joe's and I am NOT disappointed!
It is truly truly delicious!

Friday, June 6, 2014

3 Bean and Corn Salad

Tired of potato or macaroni salad this summer???

Super healthy, vegan, gluten free, filling, easy, cheap and DELICIOUS


Here is what you need: 
1 can tri beans (black, kidney, great northern) $1
1/2 bag of frozen (roasted) corn $1
1/4 white onion, diced $0.50 (green or red would also be great)
1/3 sweet pepper, diced $0.50
1 generous handful of cilantro, finely chopped $1
juice of half a lime $0.25
sprinkle of sea salt, black pepper, paprika

Cook corn on skillet or in microwave until defrosted and wonderful
Put all ingredients into a mixing bowl and sprinkle with sea salt, black pepper, paprika and mix together!

 I ate it plain for lunch today but for dinner I would put it over rice and tomorrow I’ll probably throw it in a tortilla with sour cream and avocado and shredded lettuce for a burrito and it will be awesome for taco salad. and lets not forget chip dip- add avocado, sour cream and/or salsa

the corn and beans mixed together forms a complete protein and its so versatile so I made a huge bowl of it (3 or 4 servings) which costs like $4 total! 

Perfect for lunch, snacks, dinner and get-togethers!

Wednesday, May 21, 2014

Vegetarian Chili

You simply have to make this recipe! it is the best of the best!

don't believe me?


Well this is me with my TROPHY. I entered my vegetarian chili into my very first chili cook-off at the Science Museum of Virginia and won the people's choice award! I was so proud :):) 

A win for the vegetarians! 
(vegan and gluten free as well!... until you add the beer...or top it off with sour cream and cheese...)


Grant doesn't eat beans so when I make this I get to have it all to myself! and it usually takes me like two weeks to finish it. It lasts forever and seems to get tastier with each passing day because as the spices sink in, their full flavor comes out. This recipe makes about 10 servings. (12 cups technically) 

A lot of recipes on this blog are just estimates but this one has an exact recipe passed down from my grandmother! 

Here is the EXACT FAMILY RECIPE  

2 tbsp olive oil
1 1/2 cups chopped sweet pepper
1 cup chopped onion
3 cloves garlic, minced (or a heaping tablespoon or two of jarred, minced garlic)

2- 28oz cans diced tomatoes
3- 15oz cans beans (I use black, kidney and great northern)

1 tsp sugar
1 tsp oregeno 
1 1/2 tsp dried basil
1/2 tsp ground cumin
1 tsp ground allspice
1/2 tsp salt
1/4 tsp pepper
1/4 tsp hot pepper sauce
3-4 tsp of chili powder
1/2 cup raisins
1/4 cup red wine vinegar
1 bay leaf

1 12oz bottle of dark beer
1/4 cup of cashew nuts
1 cup shredded cheese

Heat olive oil in 4-6 quart sauce pan. Add diced green pepper, onion and garlic. Cover and cook over medium heat for about 10 minute or until vegetables are tender, stirring occasionally. 

While the vegetables are cooking open your cans and drain and rinse the beans. Then in a large bowl combine the beans, tomatoes (undrained), raisins, vinegar, chili powder, sugar, basil, oregano, cumin, allspice, salt, pepper, hot sauce and the bay leaf. 


Once the vegetables are tender, mix the entire contents of the large bowl into the sauce pan with peppers, onions and garlic. Bring the mixture to a boil and pour in the beer. Then let it simmer uncovered for 30 minutes or to a desired consistency, stirring occasionally. Remove the bay leaf and stir in the cashews (we do this step last to preserve the crunchiness!)


And there is always room for variation! last time I made this I added a half a package of  organic soy chorizo from Trader Joes ($1.99) and it added some really nice spice and made it that much more filling. I like it with the chorizo but I also love how clean the recipe is without it. With or without, the chili is extra hearty and has a really robust and satisfying flavor.  I enjoy this hot OR cold or even as a dip for tortilla chips, but its really best served over rice with some cheese sprinkled on top, with a dollop of sour cream and a splash of hot sauce


As for cost effectiveness- look no further! This recipe makes TONS. I made it when we were out of food and out of money and I needed to provide myself with lunch and dinner for the week and had most of the ingredients already.  Most the spices you may already have in your pantry- and if not they are a worthwhile investment because they aren't weird ingredients that you won't use in other dishes. The bulk of the recipe is canned beans and tomatoes which adds up to about $4-5... The most expensive ingredients have to be the cashews and the beer. The beer isn't totally necessary- I barely notice when I skip this ingredient but the cashews are the best part and definitely worth it. 
Tip: if you buy them in the bulk nuts section of the grocery store it is very, very inexpensive to just get 1/4 of a cup. 
Another tip: "broken cashews" from Trader Joes are at least $2 cheaper than perfect, whole cashews for some reason ?????

Anyway, I hope you can join my family and the staff and guests of the Science Museum of Virginia in enjoying this recipe!


Wednesday, April 30, 2014

Creamy Dreamy Spaghetti Squash

This recipe is a dream come true! It is the most satisfying substitute for macaroni and cheese  ever- I honestly love it more than pasta- based mac n cheese!


Basically, to make this dish you just replace the noodles with spaghetti squash and otherwise treat it like home made mac n cheese... which means if for whatever reason you don't like my recipe (not likely) you can just as easily use your grandmothers mac n cheese recipe- if that's your fav.

What you will need:

  • 1 large spaghetti squash
  • butter, milk, flour
  • cheese!
  • onion (sweet, white or yellow)
  • broccoli
  • olive oil/cooking spray
  • salt and pepper
  • a ceramic baking dish, with lid


To prepare the noods,

  • Preheat the oven to 375.
  • Cut your spaghetti squash in half, (hot dog way) and scrape out the seeds.
  • using your cooking spray lightly spray a little oil to the squash so it doesn't dry out in the oven, and season with salt and pepper
  • Roast for 45-50 minutes, or until a fork easily punctures the flesh of the squash. If the squash seems to be drying out while baking, brush with an additional tablespoon of olive oil, or an extra spritz of cooking spray
  • remove from the oven and allow to cool enough to handle
  • using a fork, scrape out the stringy "noodles" and put them in a ceramic baking dish to await the CHEESE
While your squash is cooking, make sure you are multitasking! 
  • start dicing up that onion (I used about a quarter of 1 large onion)
  • begin steaming or lightly boiling little florets of broccoli

once your squash is baking, your onion is diced and your broccoli is steaming/boiling, Imma teach you how to make a cream sauce (very valuable stuff)
  • In a sauce pan, melt a tablespoon or two of butter
  • just when it melts add a spoonful of flour, just enough for the butter to saturate 
  • quickly add a splash of milk!
  • then a little more milk
  • then a little more
  • basically keep adding splashes of milk every time the mixture starts to thicken up and bubble
    • this requires constant attention or the mixture will begin to burn and congeal to the bottom of the pan... and don't bother putting the cap back on the milk until you are done because you will be adding milk every 30 seconds or so)
  • This allows it to become thick and creamy, if you add all the milk in at once the sauce will be a lot thinner and- milkier. By the end you probably will have added about 2 cups of milk and the mixture is starting to thin out a little. (this is where I like to season with a little black pepper). 
Now that your creamy base its done, its time to add the cheese.
I would suggest using cheddar cheese, but I actually just use bits of cheese that I needed to use up from my fridge, the more cheese types the better! This dish had some shredded mozzarella, shredded nondescript 'orange' cheese, monterrey jack and cream cheese. (I think the cream cheese really made it fantastic!) 

So I added all this cheese right in with cream sauce and stirred it non stop until it was a melty, gooey, creamy bowl of awesomeness! 

At this point your broccoli should be ready to drain (cooked but still firm) and lets assume you cooked your squash ahead of time and the noodles are patiently waiting in the ceramic bowl. 

mix the broccoli and the diced onion in with the squash noodles and mix it all together with the cheese sauce until everything is even and coated in cheese. If you have crispy french fried onions, I highly recommend topping off the dish with them (I didn't have any this time). Put the lid on the dish and bake for about 20 minutes at 350F. 

remove, let cool and enjoy!!

I am an excellent multitasker (and had a boyfriend in the kitchen helping) so we pan-fried some brussel sprouts to have on the side (my favorite) 


So, Okay, this recipe calls for butter and bowl of gooey melted cheese but at least we nixed the carbs introduced by pasta and replaced it with fiber and vitamin filled squash! Ultimately, we had veggies with veggies, with a side of veggies and that deserves a self-five... even if some of them were coated in a cheesy cream sauce...

This was also a very inexpensive dish to make. A spaghetti squash usually costs about $1.50 and it produces A LOT of food (this made about 4-5 servings). We had all the other ingredients in our refrigerator and cupboard- nothing fancy! So if you need to use up cheese, or salad toppings (broccoli, peas, tomatoes, mushrooms, etc.) it might be time to buy a spaghetti squash and try this out! 

*This recipe is also helpful if your little one is at that delightful stage when he only wants to eat mac n cheese and you need a creative way to sneak some extra veggies into his diet ;)

Monday, April 28, 2014

Guacamole


I have received so much praise over this recipe and let me tell you- it rocks!

This is what you will need:
·         3 avocados
·         Finely diced cucumber (like 1 handful?)
·         Finely diced onions (Quarter of an onion)
·         Minced garlic (1 tablespoon)
·         Finely chopped cilantro (1/2 a handful)
·         Green pepper Tabasco
·         Juice of ½ lime 

Roughly mash avocados and combine all ingredients.
I could literally eat this on anything- breakfast burritos, taco salad, wraps, quesadilla, eggs and toast! but of course it is always wonderful with good old tortilla chips <3


I highly recommend investing in one of these avocado tools! ours was $10 from Crate and Barrel and it probably the most used tool in our kitchen (we go through 3 or 4 avocados a week). The knife-y end is for cutting the avocado in half, the round part in the middle is for picking out the pit and the round, slotted end is for scraping the meat of the avocado out of the peel. LOVE IT. A+. 10/10.


FYI- a bag of 4 small avocados from Trader Joes costs $3.65! 


Enjoy this Greenie Goodness! 

Thursday, April 24, 2014

Breakfast to Go

This recipe is a life saver if you are in a rush in the mornings before work or school because it allows you to make it the night before or even a week in advance!

you will need a jar, granola, trail mix, oats, almond butter, milk
All you have to do is pour all the ingredients into the jar and close it tightly!

I normally start with the granola and fill up the jar a quarter of the way
Then I add some oats, until the jar is about halfway full (this cuts the sugar and cuts the cost of ingredients)
Next I put in some trail mix (nuts, berries, seeds) and top it off with a dollop of almond butter- or whatever nut butter you prefer...

I usually make a jar up for me and a jar for Grant and leave them on the counter for us to grab on our way to work. Just before leaving the house I add in a splash of milk and by the time I get to work the mixture is kind of a cool, creamy, crunchy delicious oat meal.

 If I had more jars I would probably prepare a weeks worth at a time because they keep forever, before I add the milk.

This breakfast usually keeps me fueled up for hours because it has a lot of protein and grains... I usually take a later lunch on days that I eat this breakfast!

Tip- Granola can get pretty pricey so I strongly recommend making your own (oats, dried berries, brown sugar, nuts, seeds, honey/maple syrup, apple sauce/mashed ripe banana baked for 20 minutes at 325 degrees). OR purchasing it at my favorite store- Trader Joes! where it is not only organic, but the price of regular cereal (just make sure you check the nutrition facts and try to find one with a lower sugar content)

Monday, April 14, 2014

Sushi


This post will save you big bucks if you are a sushi lover like me!

Sushi is one of my favorites! Its usually a special treat because it tends to get pricey...
Fortunately, I learned how to make it myself! Which means I can enjoy sushi as often as I like for a small fraction of the cost AND its surprisingly fast, easy, healthy and the ingredients are easier to find than you think!

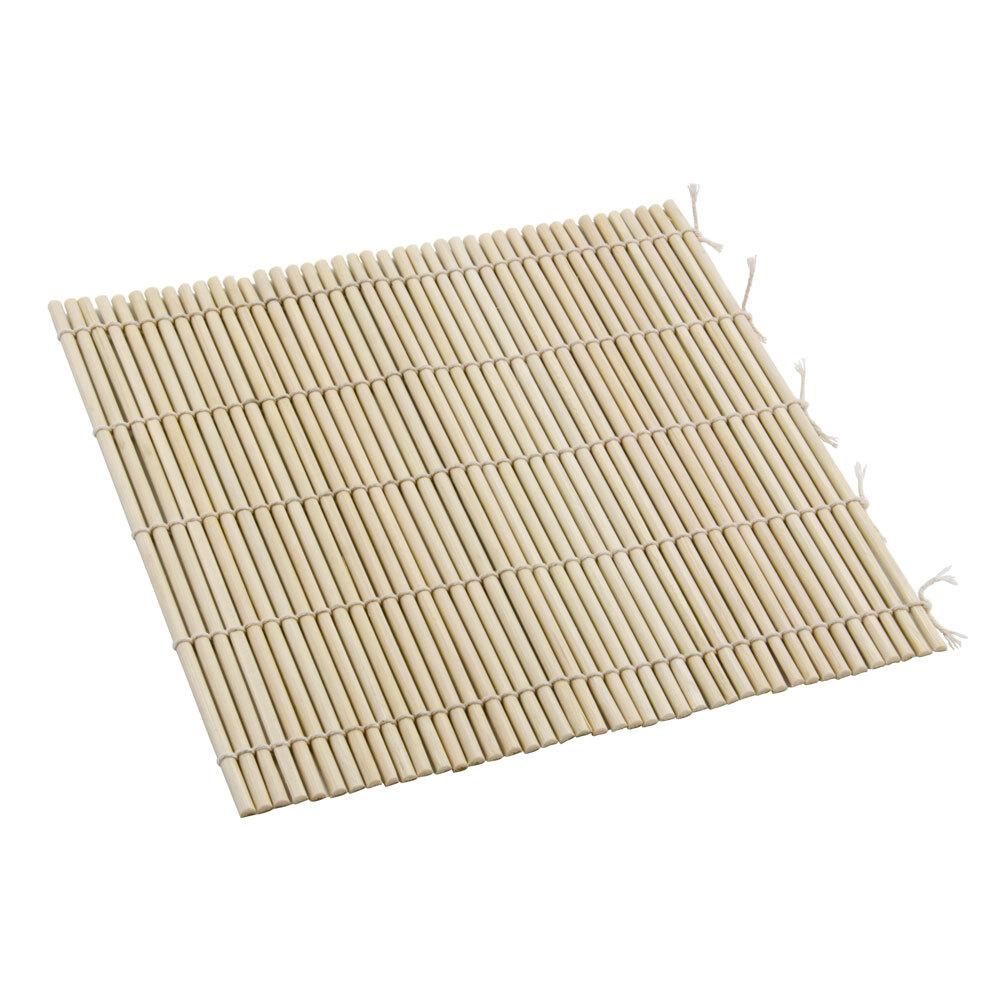
The only thing you might have to invest in is a bamboo, sushi mat like the one above. This one costs about $1.30 on eBay. The ingredients for sushi are likely not already in your pantry but they actually come relatively cheap in the Asian foods section of a regular grocery store although, they may be easier to find in a whole foods store.

you will need:
  • Nori, which is an extremely low calorie sheet of dried seaweed ($5-10 for a pack of 10)
  • Sticky rice (I used regular white rice)
  • Wasabi, soy sauce and pickled ginger- these are for extra flavor and totally optional. I usually use wasabi and pickled ginger, Grant only uses soy sauce, and my sister uses all 3!
you can either buy dry, authentic wasabi which can be kind of expensive- but it will last you a lifetime or you can use horse radish wasabi, which is much cheaper and basically tastes the same...

The fun part is picking out what you want in your sushi! 
I often use cucumber, onion, cream cheese and avocado. Occasionally I will throw in something else like left over salmon, shredded carrot or sweet potato! I normally just get creative with whatever veggies I have in my fridge. (I recently saw a sweet potato roll drizzled with honey and sprinkled with sesame seeds and I am eager to give that a try. I will keep you updated). 

To make the sushi rolls:
  • lay your nori on top of your bamboo mat with the grain of the nori and the mat going horizontally 
  • cover the nori with a layer of rice. The layer should be thin but should completely cover the nori so none of it is showing. make sure to spread it all the way to the edges, but leave a little bare at the top of the sheet.
  • along the bottom of the rice/nori, closest to you, arrange your fillings, horizontally in a narrow line going all the way across, from edge to edge. Make sure there are no gaps in the line and all of the ingredients will be in each cross section.
  • from the bottom lift the bamboo mat and roll the nori/rice fillings all the way over. Pause, and apply a little bit of pressure to the roll to make sure it sticks. 
  • continue rolling, pausing to squeeze the mat, gently but firmly until the sushi is all rolled up.
  • unfold the mat from the roll and make sure not too much rice or filling squished out, (and if it did shove it back in, gently)
  • carefully cut the roll at every inch (5 cuts) and
Voila! 6 sushi pieces!


Garnish them with a tiny blob of wasabi, a piece of pickled ginger or just dip them in soy sauce and enjoy!

I normally make 3 rolls and split them with Grant. If we are really hungry I serve it with miso soup (from an organic mix that I found at a whole foods store) 

They also go great with kale chips! more to come on those babies!